
SAP has provided some predesigned form templates. If you want to make a small change to the standard form, then use the predesigned form template and edit it. Otherwise, you can create a custom form template from scratch. The same process can be followed for both SAP Public Cloud and Private Cloud. Below are some steps to follow.
Table of Contents
Create Custom Form Template in SAP Public Cloud & Private Cloud
Step 1: Download the Predesigned Form Template
First, download the predesigned form template as per your requirements. For example, if your requirement is creating a custom purchase order form, then first download the standard or predesigned purchase order form.
Step 2: Modify or edit the Form
After downloading, Change or customize the form as per your requirement. Customize the form template using Adobe Life Cycle Designer software. After customization, you want to upload the customized form template file into the SAP public cloud system means the SAP customize system (not in the development system).
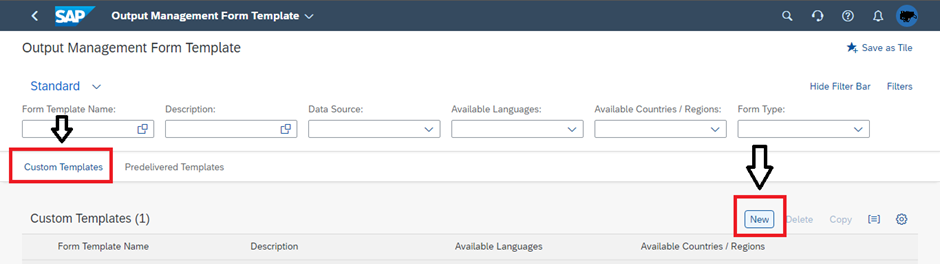
Step 3: Upload your Custom Form
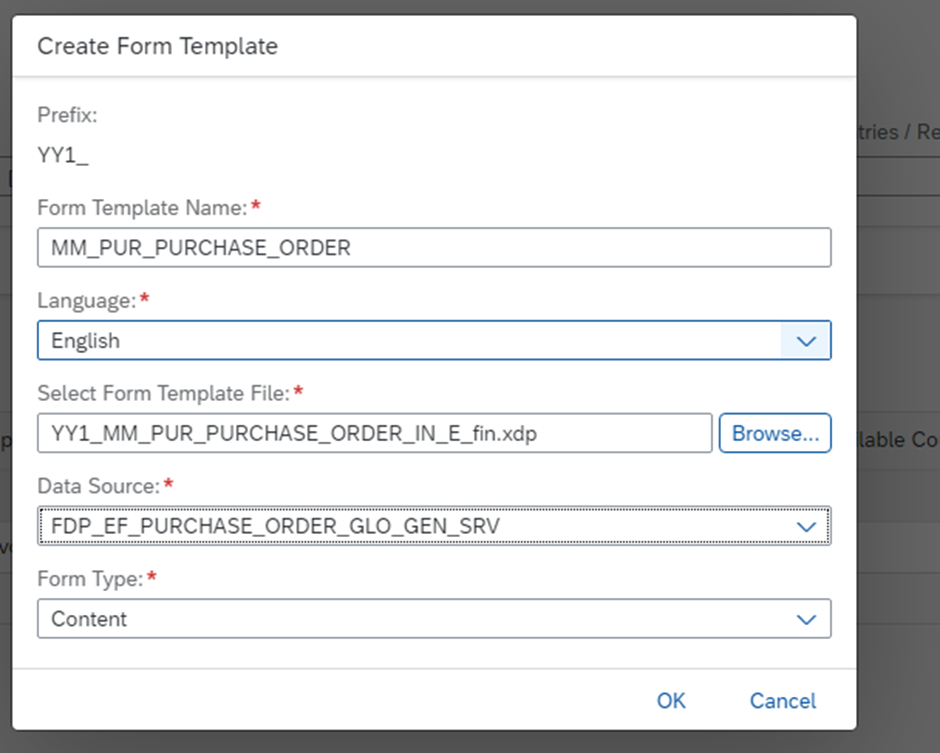
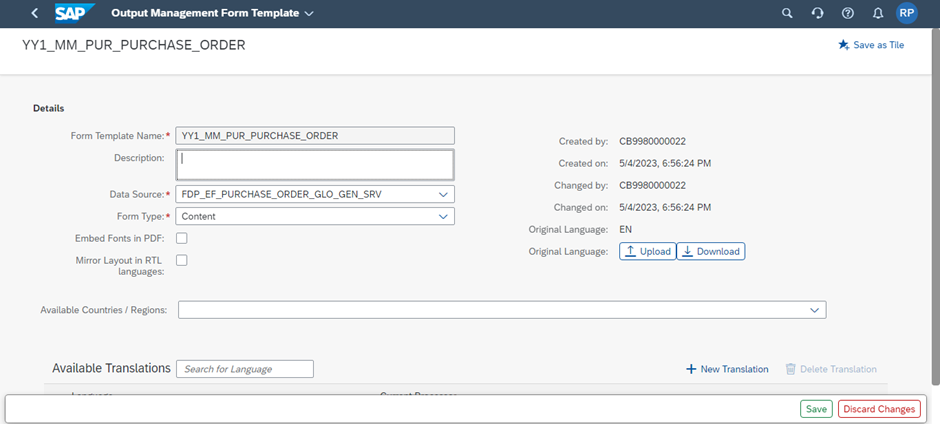
Go to the search icon, search Maintain form template, go to the custom template tab, and click the new button. Enter the form name as your choice, but related to your form. Select your form file those files you edited or customized, and choose the data source name. When you download the standard form, the screen mentions a data source name that is the same name you chose here. Choose a form type whose name is also mentioned in the standard form download screen. After that click ok, write the form description, and save that template.
Step 4: Assign & Display the Form Output
After uploading the custom form, you want to assign the form. After that, you will be able to display the custom form template output.
Assign Custom Form Template in SAP Public Cloud & Private Cloud
There are two ways to assign your custom form to the system. One is using the "Implementation Activities" app, and another is the "Manage Your Solution" app.
Using the Implementation Activities App
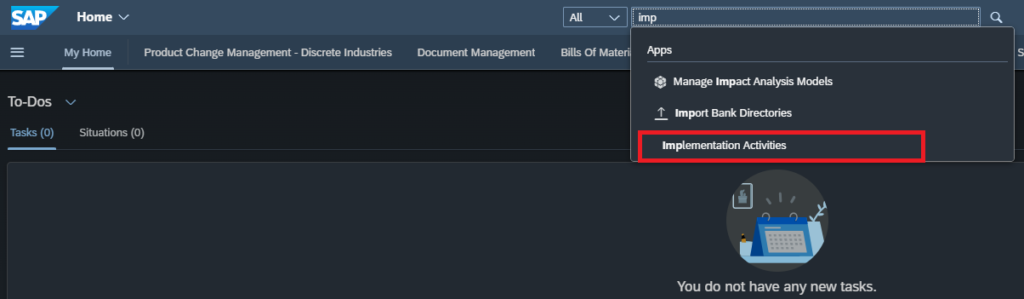
Step 1: Open the Implementation Activities app
Go to the home screen, search for the Implementation Activities tile or IMP, and open it. if you cannot find that tile, then ask your basis team to assign a role for your required tile.
Step 2: Inside, Open the Assign Form Template App
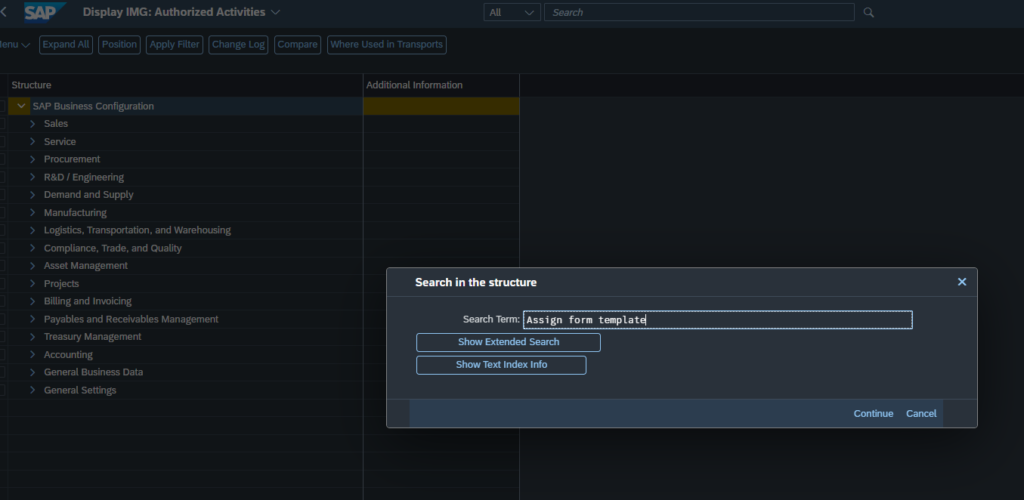
Now you go to the marked search box, find and open the "Assign form template" app.
Note: If you click a right-side button, then the assign form page will open. If you click a left-side button, then open the documentation of the Assign form template app.
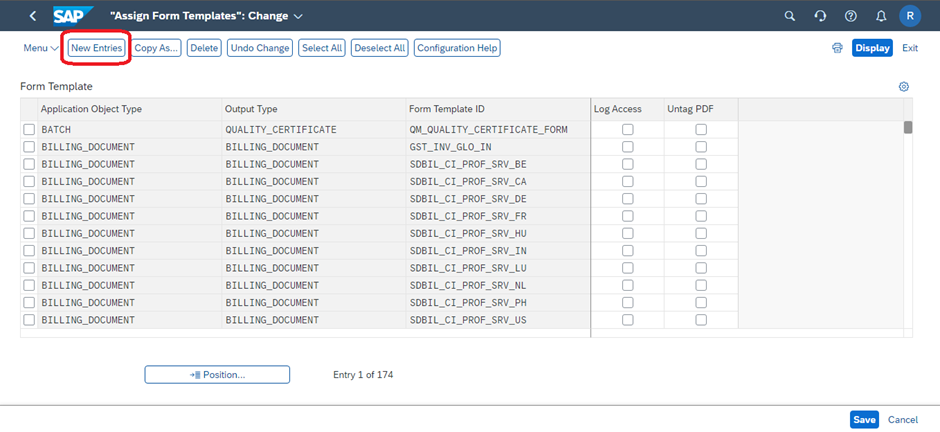
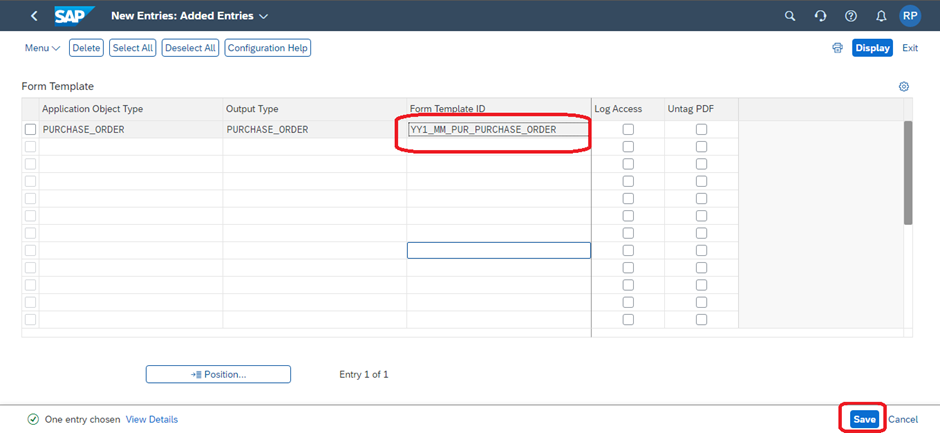
Step 3: New Form Entry with Output Type
Go to the change mode, click the New Entries button, and fill in the application object type name, output type, and form template ID. As per our requirement, you want to assign a purchase order form, which’s why the Application Object Type is Purchase_order, Output Type is Purchase_order, Form Template ID is YY1_Custom_form_name (ex, YY1_MM_PUR_Purchase_Order) (this form name you get from the maintain form template app), and save. When you click the save button, you want to save this under the TR.
Step 4: Open PO & Preview the Output
If you want to display the custom purchase order form template output, then open the purchase order display app -> change the PO -> purchase order save and output -> add output type, custom form name, and other required fields -> display document.
Note: Before taking the printout, please check whether the output type is assigned or not for the purchase order. If not, use the "Manage Output Parameter Determination" app or BRF+.
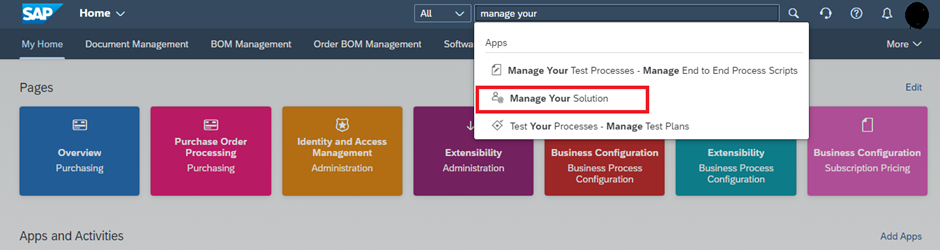
Using the Manage Your Solution App
Step 1: Open the Manage Your Solution App
Go to the home screen, search for the 'Manage Your Solution' tile, and open it. If you are unable to find this tile, ask your basis team to assign a role for your required tile.
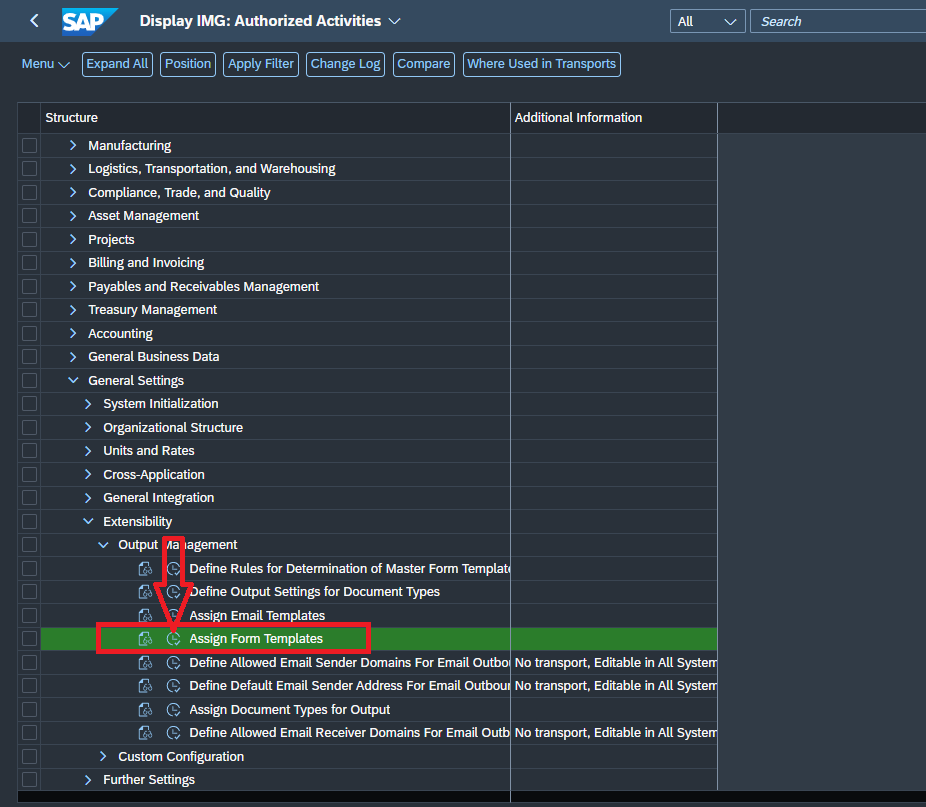
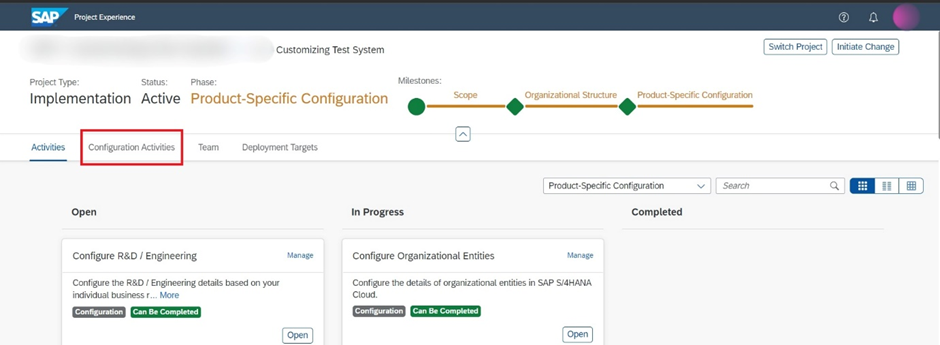
Step 2: Open the Assign Form Template App
Open the SAP Central Business Configuration link, go to Configuration Activities, and search Assign Form then you find Assign Form Template, click that, and after that, click Go to Activity.


Note: Here, steps 3 and 4 same as the previous using Implementation Activities App steps 3 and 4.
Thanks for reading.
Read More.
Custom Form template development notes from the SAP.
Fantastic!!! By following your guide, I managed to modify the Purchase Order template. I had been trying for a long time, but I couldn’t link my Custom Template to the correct Order Type (PURCHASE_ORDER). With your guide, I finally did it!!!!!!!!!!!!!!!!!!!!!!
If I may add a suggestion: there’s a step missing in the guide. After creating the Custom Template and linking it to the Order Type, you need to go to the “Output Parameter Determination” app and set your Custom Template there.
A suggestion: if – for example – you want to modify the Purchase Order Template, instead of creating a Custom Template from scratch, you can go to the Predelivered Templates, select the one for the Purchase Order (which is called MM_PUR_PURCHASE_ORDER), and then click “Copy.” This way, the template is duplicated and automatically placed among the Custom Templates with all the preset data, and then you just need to replace the .xdp file with your own.
Anyway, huge thanks for your guide because it helped me so much.
Greetings from Italy.
Thanks for your suggestions. I am happy 😊, this guide has helped to you.